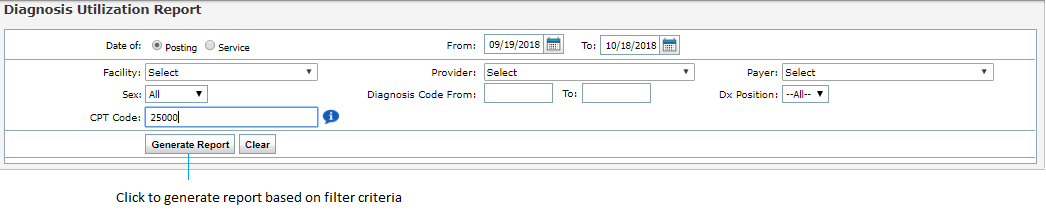
The Diagnosis Utilization Report allows the user to view the diagnosis codes charged to insurances for a specified time range.
In the Diagnosis Utilization screen, the user can select from the following report filters:
| 1. | Filter by Date of Service or Date of Posting by clicking in the radial buttons. |
| Note: The Date of Service is the day the diagnosis code was originally entered. The Date of Posting is the day payment was posted for that appointment/diagnosis code. |
| 2. | Select the Date Range to include by clicking the icon. icon. |
| 3. | Select the Facility to include using the drop-down menu. |
| 4. | Select the Provider to include from a list of active and inactive providers using the drop-down menu. |
| Note: Based on the selection, the report can be generated for an inactive provider as well. |
| 5. | Select the Payer to include using the drop-down menu. |
| 6. | Select what Sex to include using the drop-down menu. |
| 7. | Begin typing in the Diagnosis Code(s) range to select the code(s) from the Smart Search results. If the code does not display, click the  icon to perform a Diagnosis Code lookup. icon to perform a Diagnosis Code lookup. |
| Note: If you want to generate a report for a single diagnosis code, that diagnosis code must be entered in both “From” and “To” fields. |
| 8. | Select the DX Position to include using the drop-down menu. |
| 9. | Enter CPT Code to include in the report. |
| 10. | Click the Generate Report button. |