When working with the Day mode, you can see time slots with an hour difference on the left side. For example, if your schedule starts at 8 am, then it shows 8, 8.30, 9, 9.30, and so forth. In each respective box on the screen, you can see all appointments with basic details. You can click the particular appointment to view the details. As per your system’s current time, the time slot on the Scheduler will appear in yellow for easy identification. You can also find a separator after each 1-hour slot so that you can clearly view the details on the Scheduler.
Using the Day mode, you can:
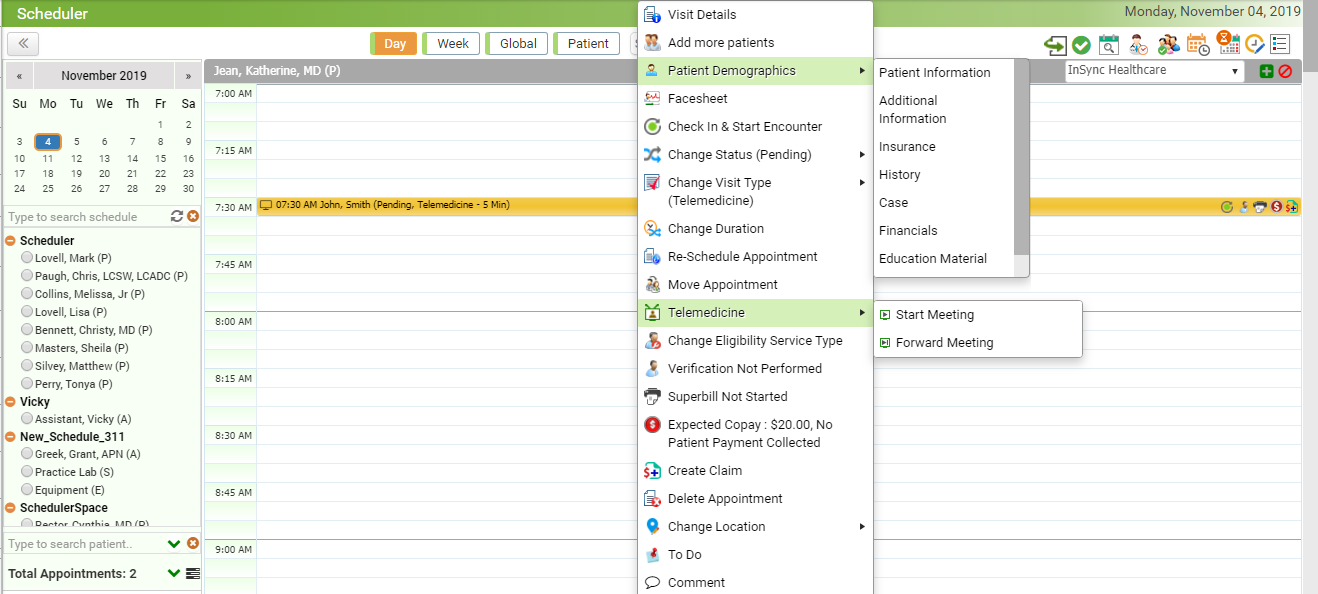
| • | view visit and patient details. |
| • | add more patients to convert the appointment to group appointment. |
| • | navigate to various sections of Patient Demographics. |
| • | view patient's clinical information and medical records by click the Facesheet option. |
| • | check-in the appointment and start encounter for that appointment. |
| • | change status, visit type, and change duration, if required. |
| • | reschedule and move appointment, if required. |
| • | start Telemedicine meeting, if configured. |
| • | perform eligibility verification and change eligibility service type. |
| • | collect patient's copay. |
| • | change appointment location. |
To work with the Day mode:
| 1. | From the Bookmarks pane on the left side, click the Scheduler icon  . . |
| 2. | Select the Calendar View and choose the Day mode from the top of the Scheduler screen. |
| 3. | To access additional options for any appointment, left click the corresponding appointment. |
| 4. | To book a new appointment, click any of the the blank slot. |
| 5. | To block certain time slots, click the icon  available at the top right corner. available at the top right corner. |
| 6. | To check In the appointment and start encounter for that appointment, click the icon  . . |
| 7. | To view eligibility verification status, click the icon  . . |
| 8. | To start a superbill for that appointment, click the icon  . . |
| 9. | To view copay details for the appointment, hover mouse over the icon  . . |
| 10. | To create a claim, click the icon  . . |